Digital Matte Painting - Project 2: Invisible Set Extension
15/05/2023 - 16/06/2023 (Week 7 - 11)
WONG JUN ZHE / 0353613
Digital Matte Painting / B' Creative Media / Taylor's University
WONG JUN ZHE / 0353613
Digital Matte Painting / B' Creative Media / Taylor's University
Project 2: Invisible Set Extension

INSTRUCTIONS
MIB
"
You will synthesize the knowledge gained in task 1 and 2 for application in task 3. Students are to demonstrate technical capability to analyse, composite and communicate set extension over raw footage or recreate it by scratch and add motion. You will dissect and deconstruct raw footage to understand the nature and concept of the footage environment requirements for extension. With the understanding gained, you are to synthesize the knowledge to produce believable and compelling footage that syncs naturally as required. You will start with sketching and move on to digitization and then generation using the appropriate software. Upon completion of the set extension you will construct a poster of equivalent to promote your creation. You will conclude by selecting and presenting your creation in the instructed format/s:
- Compiled technical doc .pdf (*moodboard, styleguide, sketches, technical processes as posted in their e-portfolio).
- Final output to ready for final project.
- Online posts in your E-portfolio as your reflective studies
"
Prep
Base Plate:

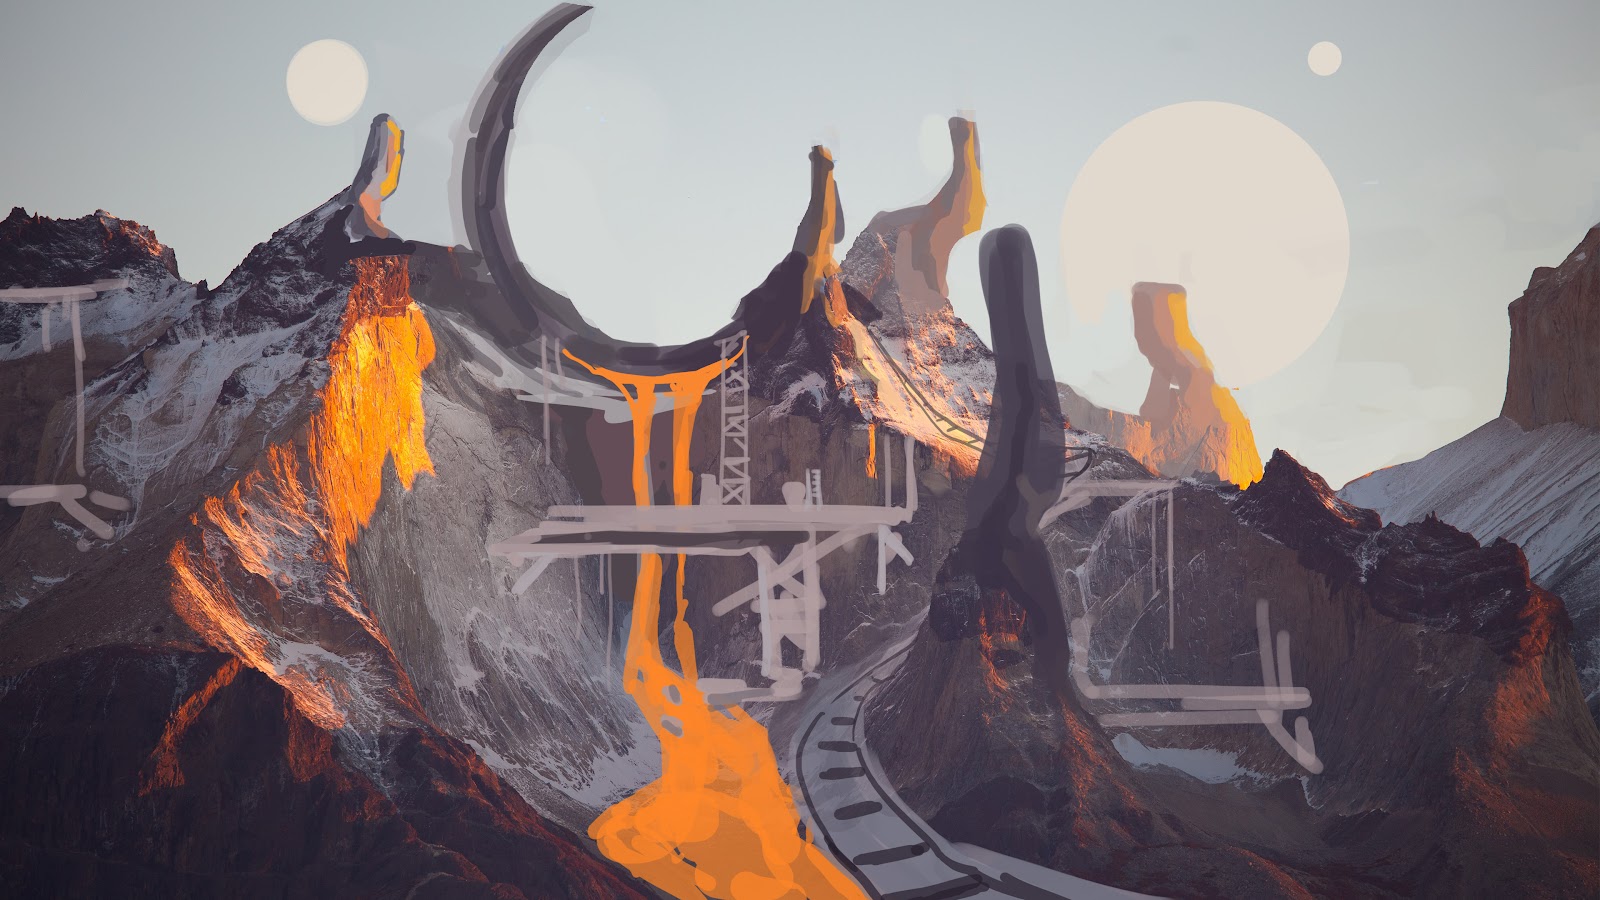
Concept Sketches:
 |
| Concept #1 (Chosen) |
 |
| Concept #2 |
Refined Sketches:
 |
| Sketch 1 |
 |
| Sketch 2 |
Photoshopin':
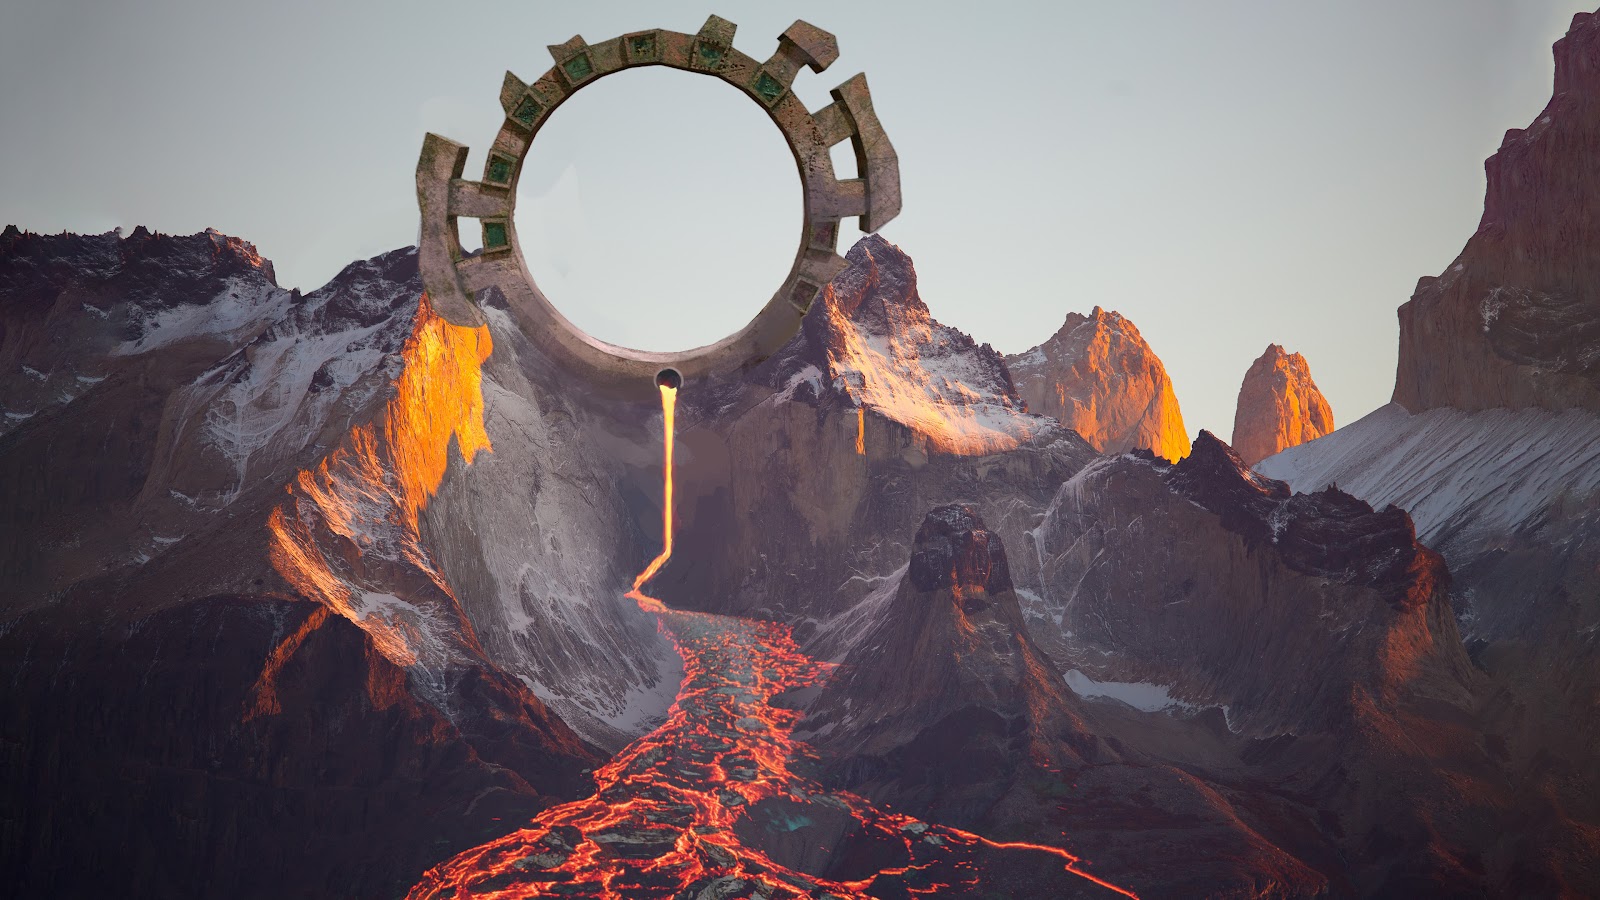
Step 1: Added lava by playing with blending modes, mostly multiply. Also added a portal as the centre of attraction.
Step 2: Added more elements. Replaced sky.

Step 3: To add effects on the portal, I searched up an image of Doctor Strange's portal with a black background. Then, change blending mode. Adjust Hue / Saturation to make it purple.

Step 4: Manually add symbols around the portal.

Step 5: Add cityscape + colour correct.

Step 6: Added ruins in the background. Used liquify to shape the part of broken portal. Manually painted details + colour correction.

Step 7: Add floating rocks as the path.
 |
| Before CC |
 |
| After CC |
Final Render
 |
| Project 2 Final Outcome |
*Assets used
 |
| Assets used |
FEEDBACK
Week 8: Concept Sketch
"Go for Concept #1. Think about the portal, what can you add to it to make it more interesting?"
Week 10:
"Add more elements. Cityscape? Another portal? Maybe a broken portal in the bg."
REFLECTION
This project helped me in understanding how things reacts to an environment. The light, shadows, reflection, etc. created by objects are crucial to make an environment look realistic. Everything has to look like it belongs to the environment. This means colour correction is important, as it allows the object to blend into the environment with its ambience.


Comments
Post a Comment